Installing the Anjuna Seaglass Operator
For OpenShift on GCP, Anjuna relies on its RedHat Certified Anjuna Seaglass Operator to manage the installation of the Anjuna Kubernetes Toolset Runtime.
This guide walks you through the steps to install the Anjuna Seaglass Operator into your cluster.
This guide assumes you have access to your OpenShift web console.
All actions performed here can be done via the oc cli utility.
|
Search and Install the Anjuna Seaglass Operator
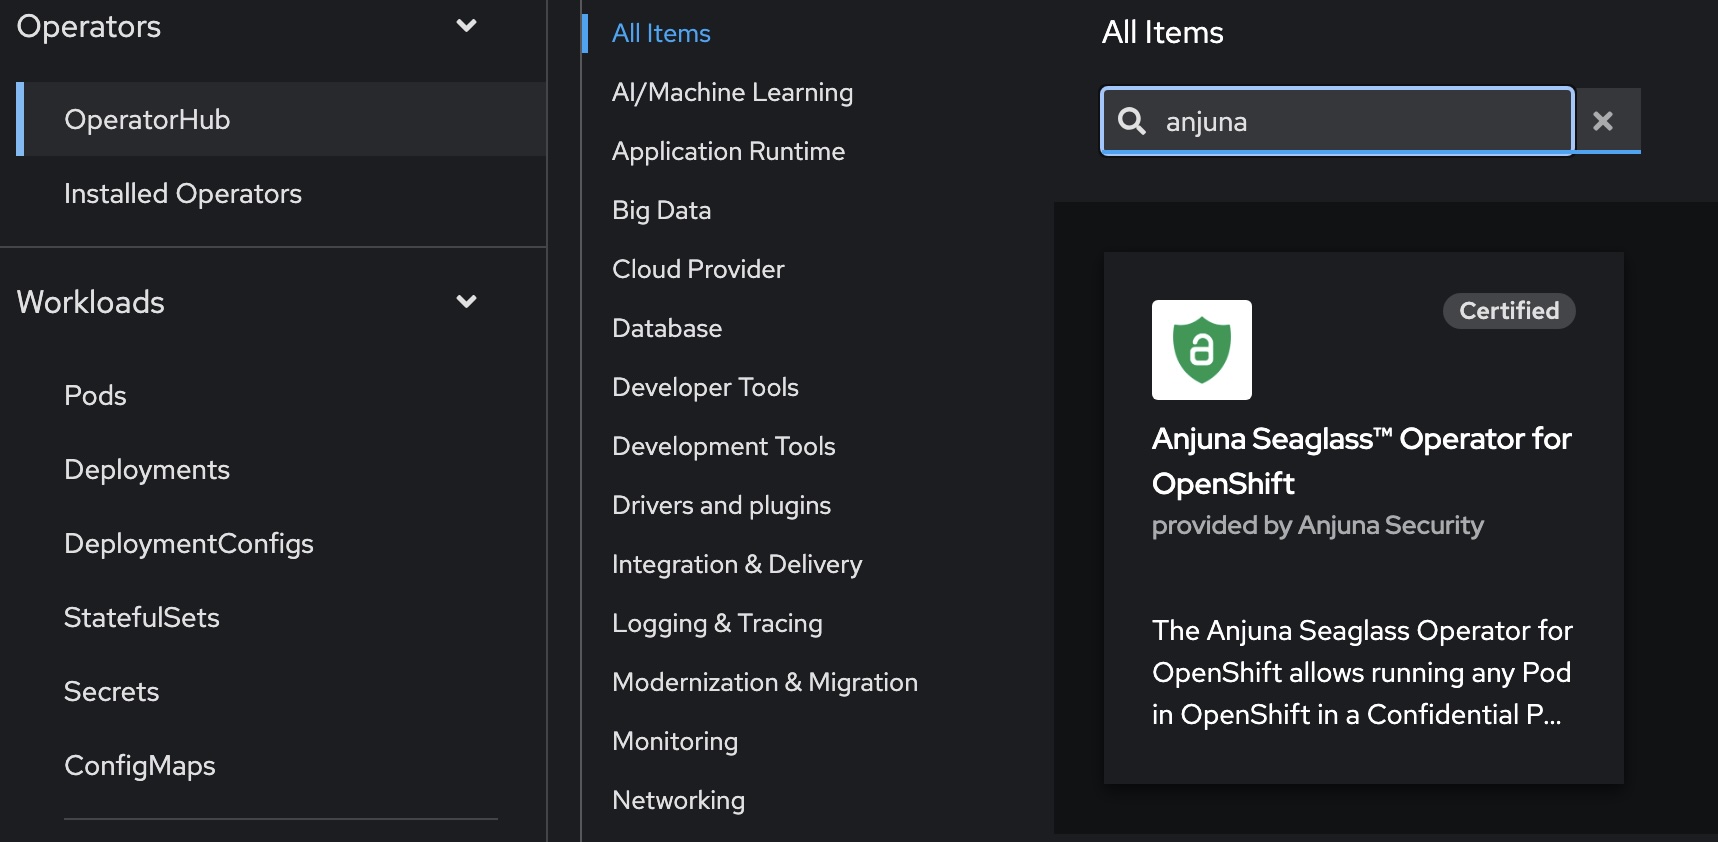
Login to your Cluster’s web console and click on the OperatorHub menu option.
Search for the Anjuna Seaglass Operator by typing anjuna in the search box:
Select the Anjuna Seaglass Operator for OpenShift and choose the version 2.0.0 and channel stable.
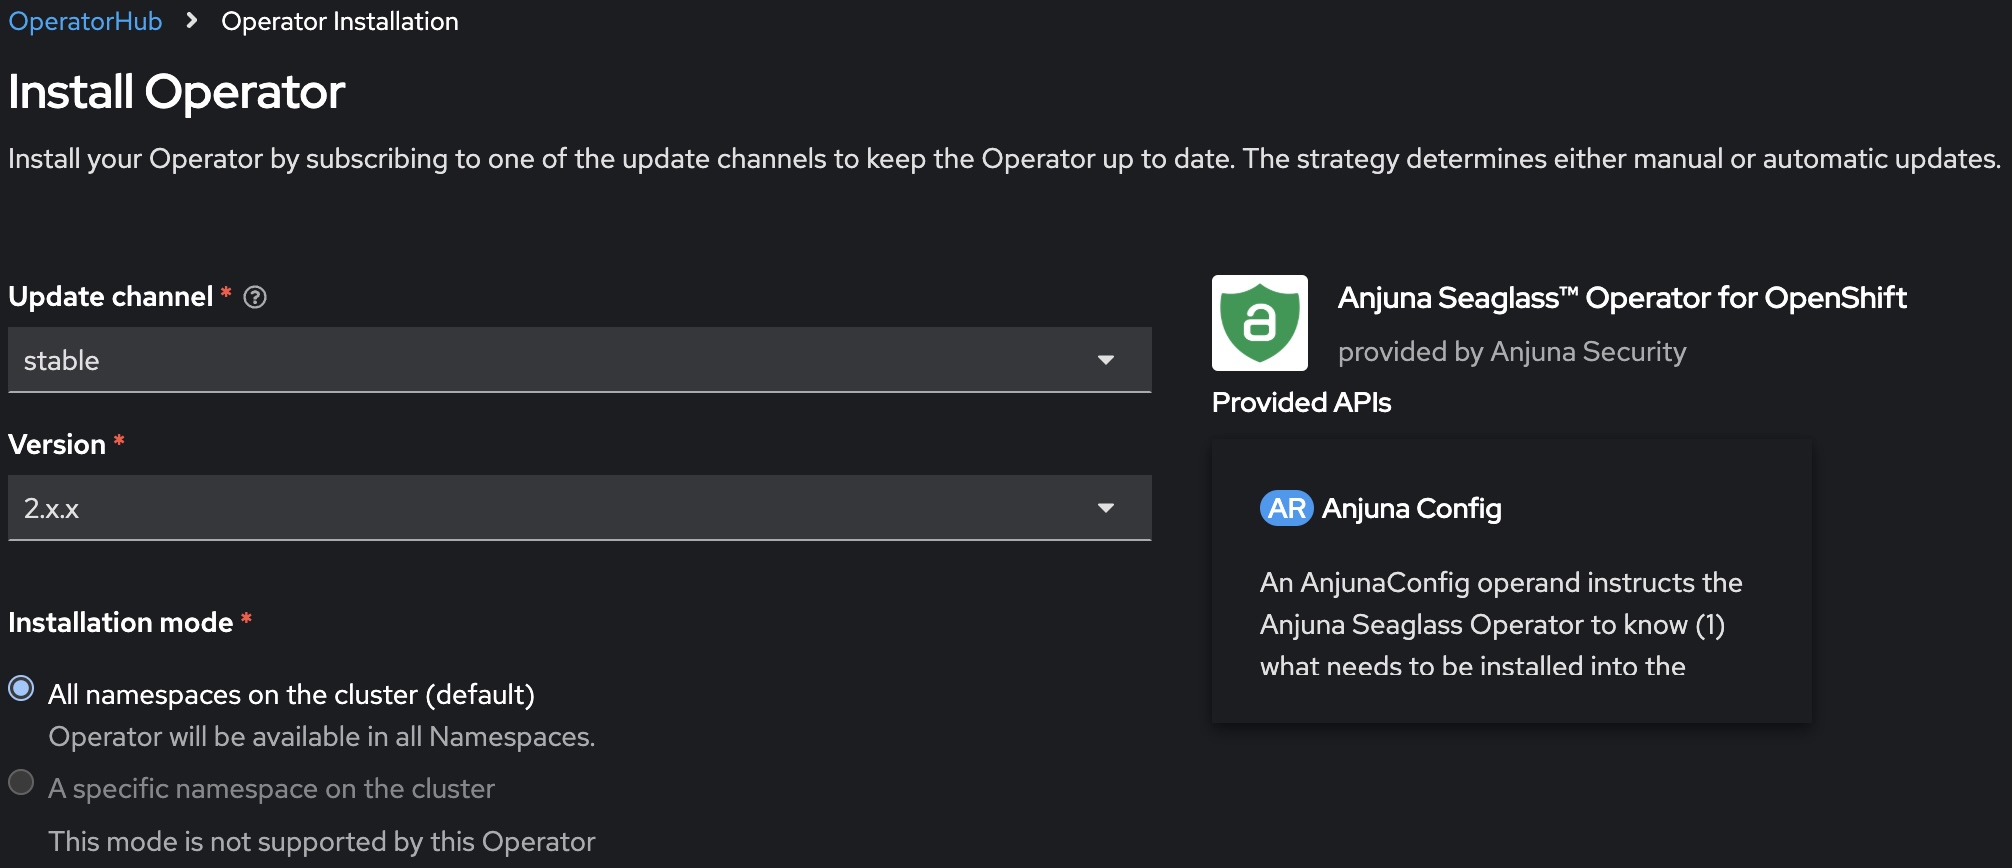
| The Anjuna Seaglass Operator currently requires a cluster-level installation. Contact support@anjuna.io if you need a namespaced installation strategy. |
Upgrades of the Anjuna Seaglass Operator currently require the cluster admin to perform a series of steps
(more details on the next page).
With that in mind, choose the Manual strategy for upgrade approvals
and click the Install button:
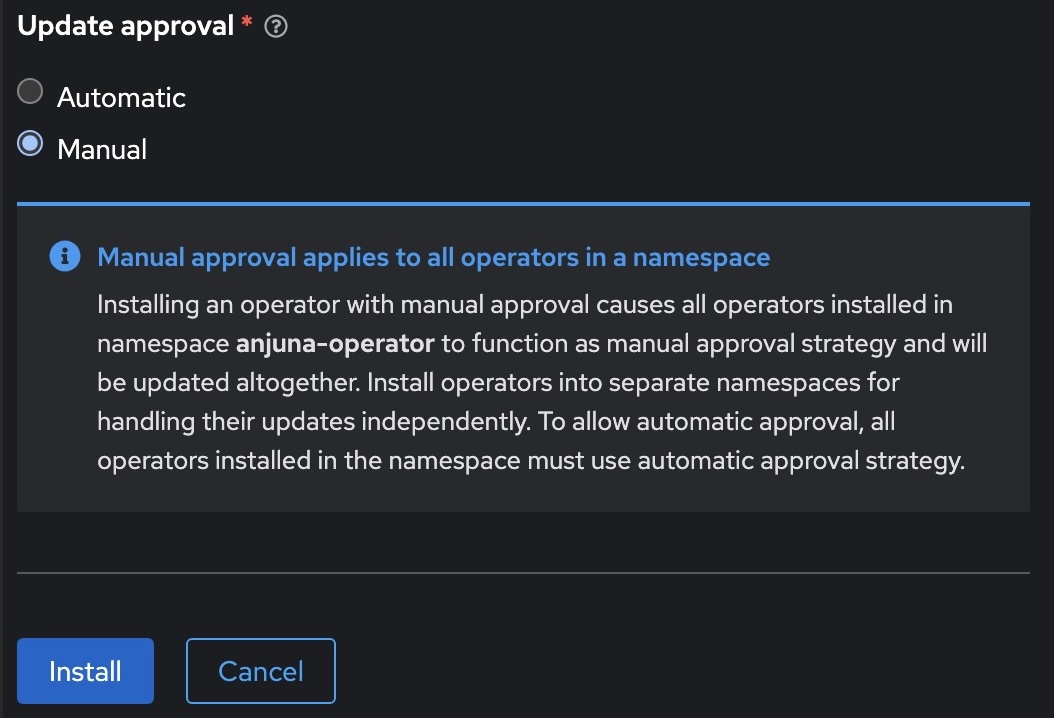
By virtue of the Manual installation strategy,
you will be prompted to review and approve the installation of the Anjuna Seaglass Operator:

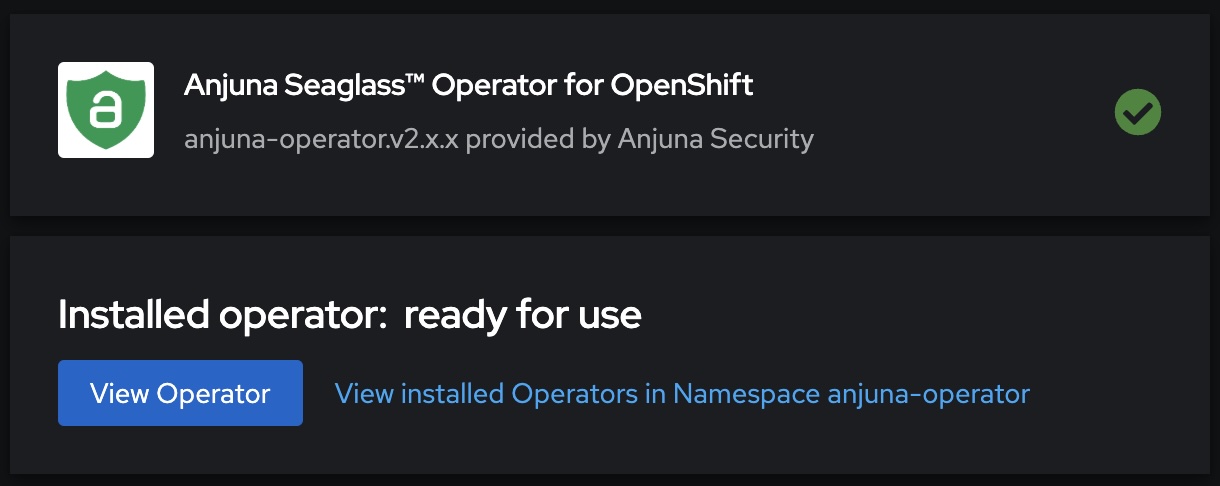
The operator installation should take about one minute.
Once ready, click on the View Operator button:
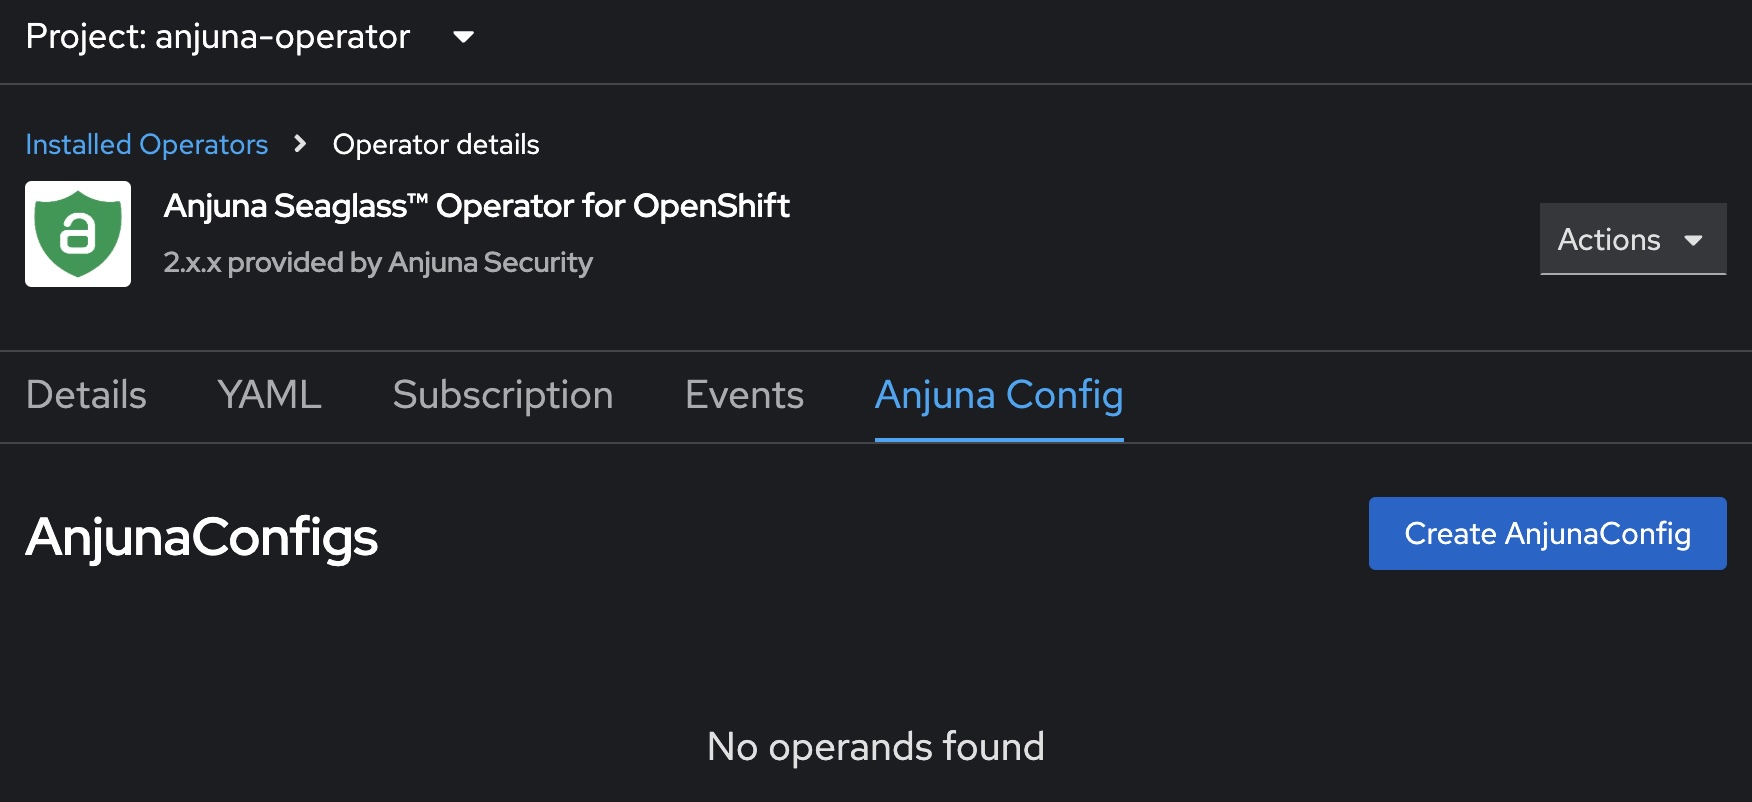
Create an AnjunaConfig
In essence, the Anjuna Seaglass Operator is triggered by the creation of an Anjuna Config operand. An Anjuna Config instructs the Anjuna Seaglass Operator what needs to be installed and in which nodes.
To install this operand, in the Anjuna Seaglass Operator page navigate to the Anjuna Config tab
and click on the Create AnjunaConfig button:
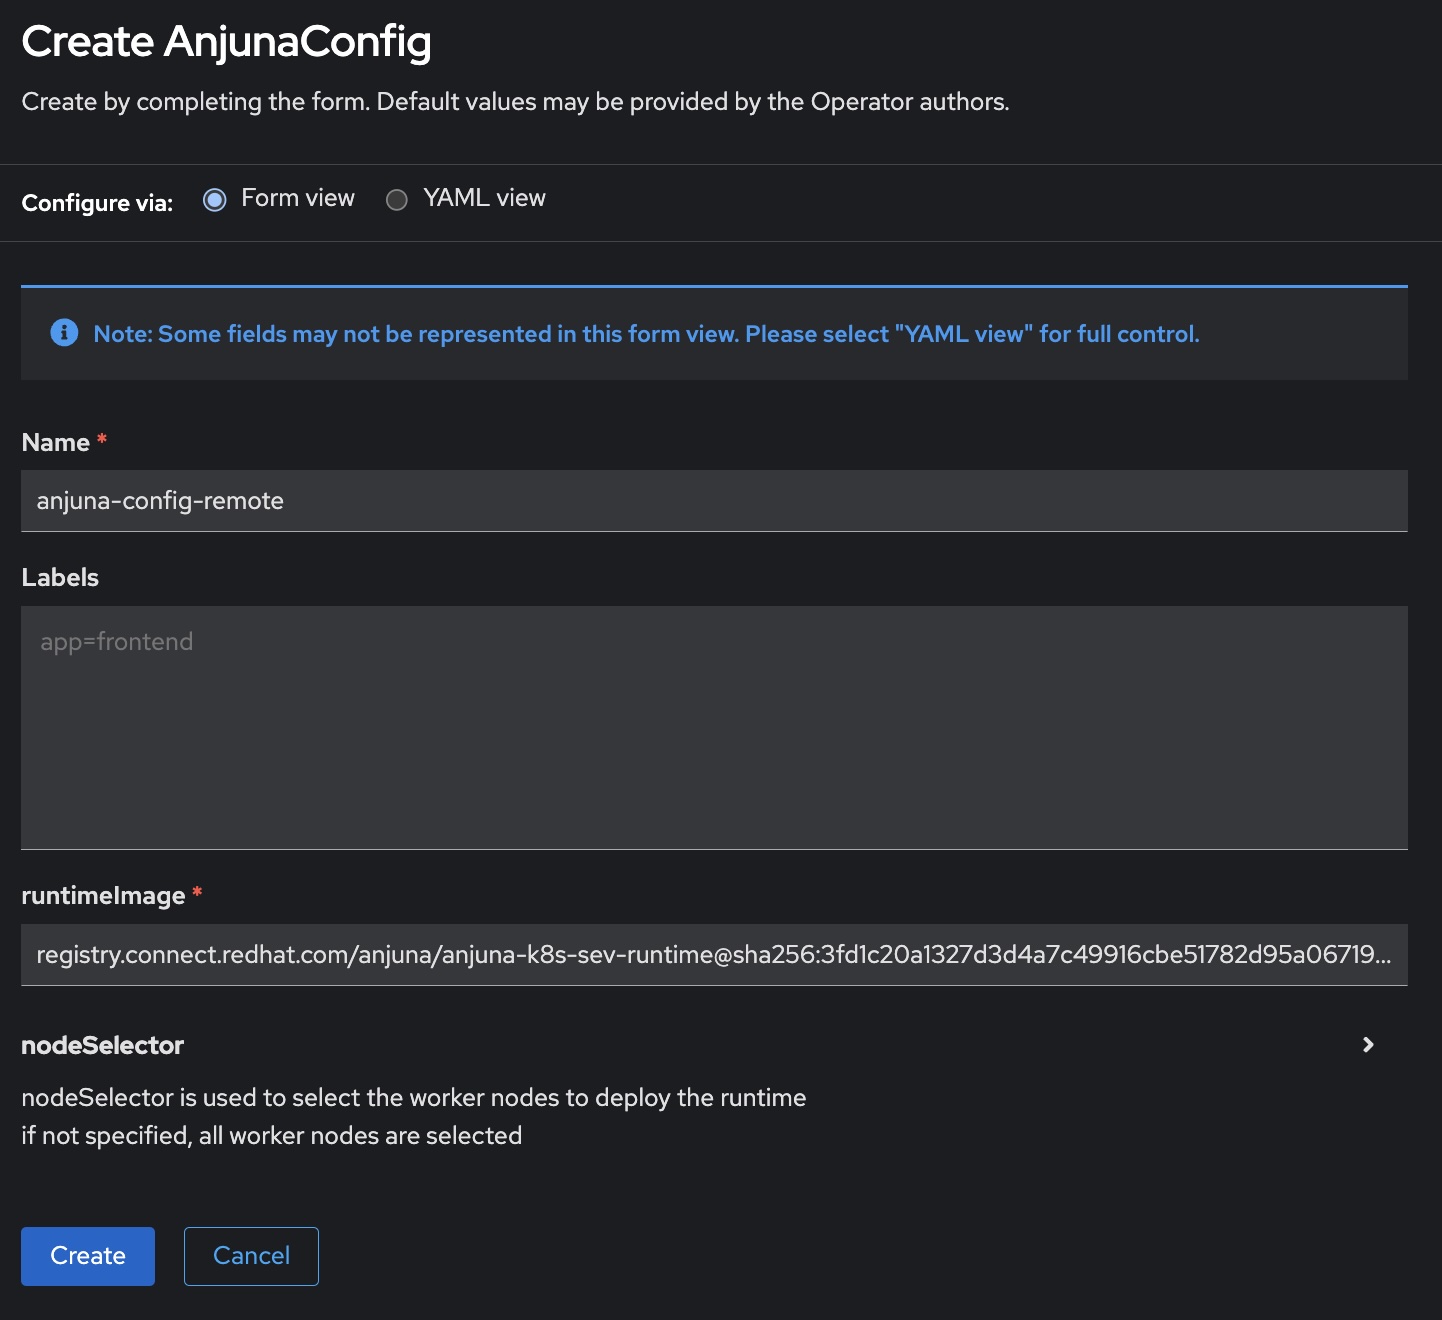
The creation form will allow you to configure the new Anjuna Config you want to add to this cluster. The following options are available:
-
Name: specifies the name of the Anjuna Config resource; -
Labels: allows you to attach labels to this resource; -
runtimeImage: a container image with the Anjuna Custom Container Runtime. This image will have the software needed to properly configure and install the Anjuna Kubernetes Toolset into your cluster nodes. Changing this value is not recommended, although it is allowed to change in case you have a internal mirror of the same image and are required to use it; -
nodeSelector: allows you to specify node selector rules that determines which nodes should have the Anjuna Kubernetes Toolset installed to.
After configuring the Anjuna Config, click on the Create button:
You should now see a new entry in the Anjuna Config tab:
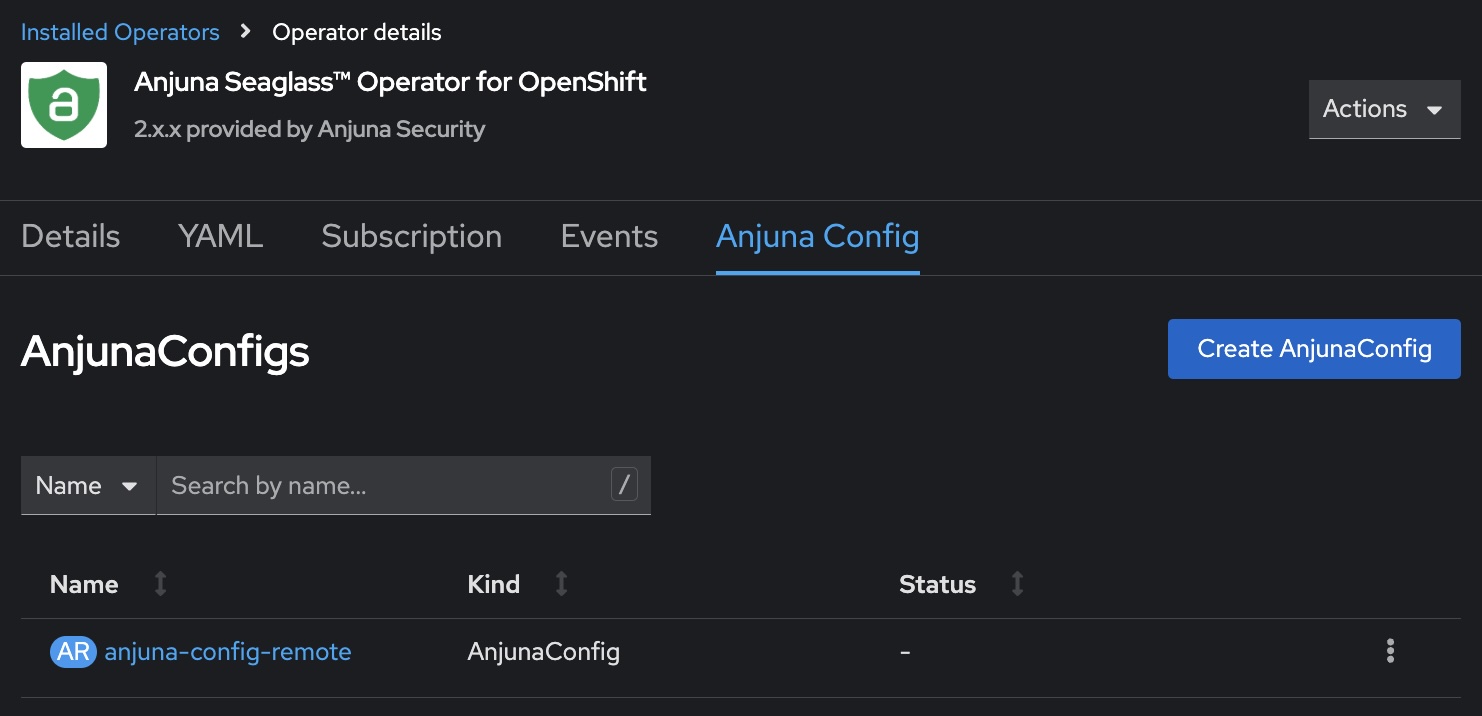
Due to a technical limitation, the field Status above will show
- regardless of the actual installation status of the Anjuna Config.
The section below provides you with instructions on how to
validate the installation of the Anjuna Seaglass Operator.
|
Validating the Anjuna Seaglass Operator installation
In your OpenShift web console, navigate to the DaemonSets menu option under Workloads.
Select the project where you installed the Anjuna Seaglass Operator. You should see the following:
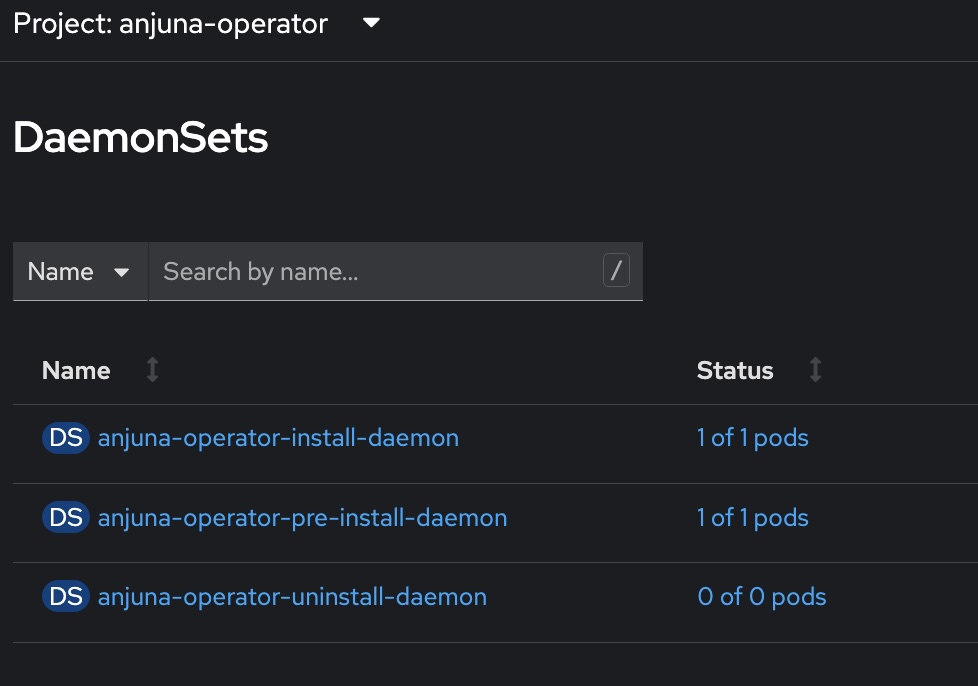
The number of running anjuna-operator-pre-install-daemon and anjuna-operator-install-daemon pods
should match the number of nodes that match the node selector rules you set in the previous step.
|
A new Kubernetes Runtime Class called anjuna-remote should now be available to be used in your pod specs.
It can be confirmed by running:
$ oc get runtimeclass
NAME            HANDLER         AGE
anjuna-remote   anjuna-remote   60m
What’s next
In order for the anjuna-remote Runtime Class you installed to be able to launch
Confidential Pods as CVMs, additional tooling is required to be installed alongside the Anjuna Seaglass Operator.
The Anjuna Kubernetes Toolset archive you downloaded in the previous page will provide you with a Helm Chart to assist in installing this additional tooling. Instructions are available in the next page.